In this guide, you will learn how to build a reliable tennis kick serve through a clear coaching progression, from fundamentals to a full motion.
Table of Contents
- Introduction
- The key to the kick serve: the grip
- Why rotation is essential for the kick serve
- Technical requirements for the tennis kick serve
- Starting situation
- Building the basic understanding
- Drill 1: The palm as a ramp
- Drill 2: The palm as a ramp with a racket
- Drill 3: Hitting upward above the head
- Drill 4: Kneeling with a short grip
- Drill 5: From the trophy position high over the net
- Drill 6: Kick serve with an initial motion
- Drill 7: Adding footwork
- Conclusion
Introduction
Learning the tennis kick serve is one of the most important development steps for a tennis player, and at the same time it is a major challenge. Because of its complexity, the serve is the most difficult stroke in tennis. Otherwise, why would even professional players often fail to put at least one of two attempts safely into the court?
As players develop from childhood into adolescence, the opening shot of the point becomes increasingly important. Growing athletic ability and higher racket-head speeds require a serving technique that combines safety with pressure. This is exactly where the kick serve becomes more and more important. As playing level increases, simply putting the ball in is no longer enough. The serve needs to be stable and, at the same time, prevent the server from immediately coming under pressure. Learning the tennis kick serve also makes a lot of sense for adult players.
The key to the kick serve: the grip
Many adult players experience that their serve is not a real weapon, but rather just a way to “get the ball in.” Often, they serve with a forehand grip. This is exactly where one of the biggest difficulties in learning a stable kick serve lies.
Players usually learn to serve with a forehand grip at first, because quick success comes easily with this grip. The racket face automatically points in the direction of the shot, which makes it relatively easy to get the ball into the service box. The player manages to start the point with the serve, and especially in the beginning that is the most important goal.
At the latest, however, when ambitions and swing speeds increase, the major disadvantage of this technique becomes clear. On the second serve, the forehand grip either leads to a significant increase in double faults or causes the server to immediately end up in a defensive situation. The reason for this is the lack of rotation.
Why rotation is essential for the kick serve
If the serve is executed with a forehand grip, it is almost impossible to give the ball effective rotation. After contact, the ball travels relatively straight forward. However, to combine high serving speeds with sufficient safety over the net, forward rotation is required.
Because of the rotation, a low-pressure effect is created in physical terms, which pulls the ball back down after it clears the net. This allows the player to hit higher over the net without losing control. In addition, rotation provides another decisive advantage. Depending on the surface, the ball bounces much higher after it lands, creating an uncomfortable contact height for the returner.
These two aspects, reliably clearing the net and producing a high bounce after the ball lands, make the kick serve a particularly effective serving option, especially in performance-oriented tennis.
Technical requirements for the tennis kick serve
Many players struggle to learn the kick serve because certain technical requirements must be met for this type of serve to be possible at all.
The first key requirement is the grip. Only with a continental grip or a backhand grip is it possible to hit the ball upward and generate sufficient rotation. The second decisive requirement is the toss. The contact point has to be above the head, so the toss must be adjusted precisely to that position.
If these two fundamentals are not understood and implemented, a stable tennis kick serve is, in practical terms, not possible. The coach’s task is therefore to break the complex service motion down into its individual components and teach them step by step.
Starting situation
Up to now, the player has served only flat using a forehand grip. Opponents increasingly take advantage of this so-called “free ball” and win more and more direct points with the return. To counter this, the player tries to hit the ball faster over the net. But because he can only serve flat, the height of the shot over the net has to drop. The result is numerous double faults.
The coach now wants to teach the player the kick serve in order to create more safety on the second serve while also putting the opponent under pressure.
Building the basic understanding
In the first step, the coach discusses the current situation together with the player. He explains which technical adjustments are necessary so the ball can be struck upward. It is made clear that the net is always the first opponent that has to be overcome.
The goal is to clear the net with the highest possible trajectory. The coach compares this to a forehand topspin stroke and explains why it makes sense to hit the ball over the net with forward spin. A higher trajectory makes it possible to play with more speed while still maintaining sufficient safety.
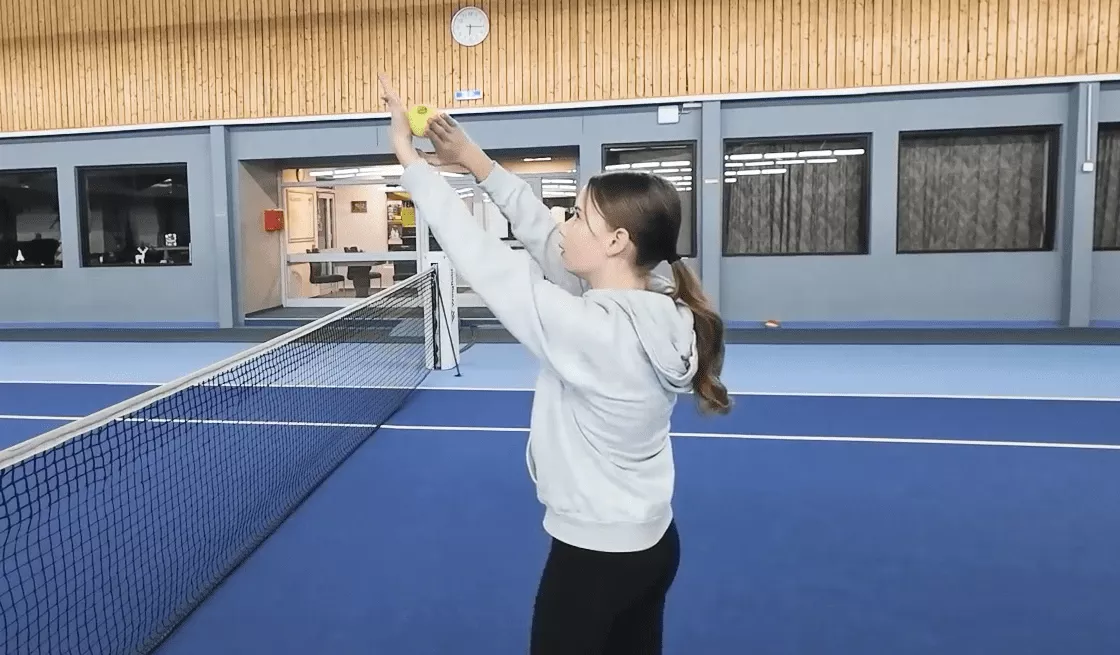
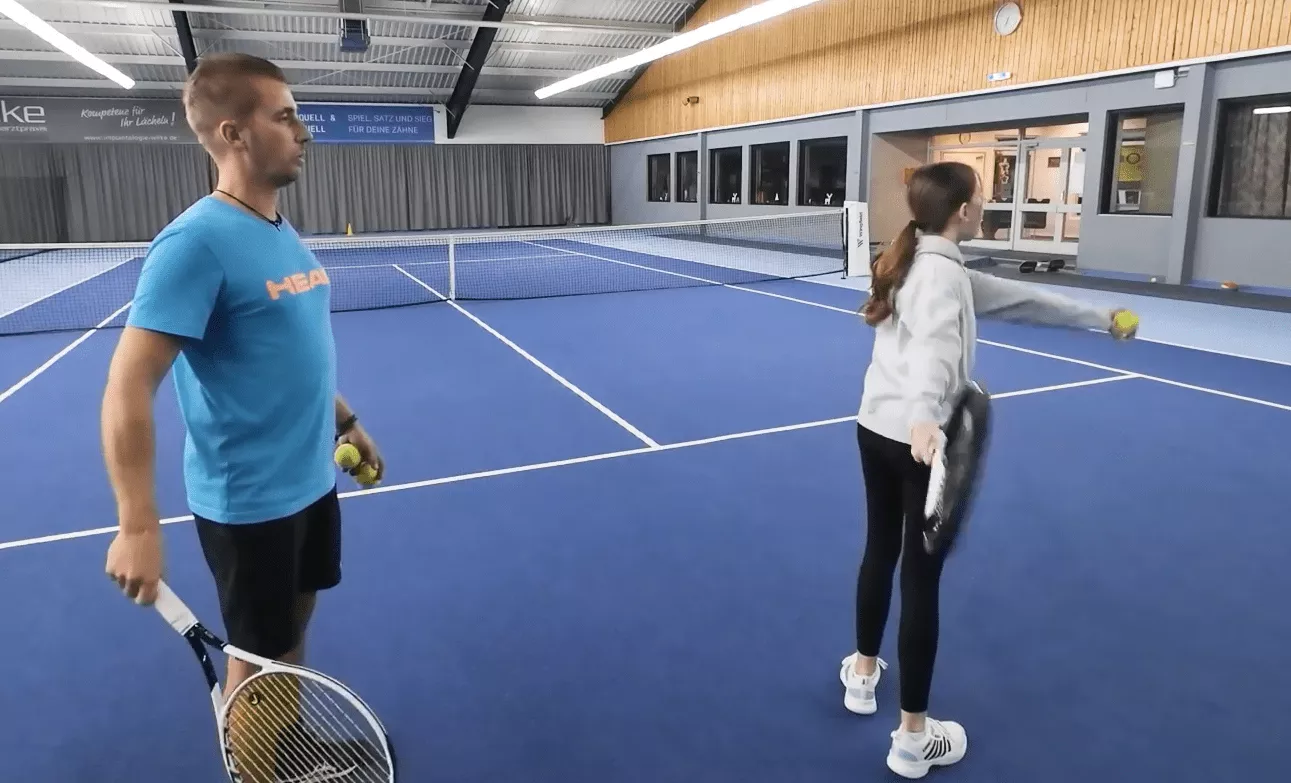
Drill 1: The palm as a ramp
The coach demonstrates the principle of a topspin serve using a ball in his hand. Both position themselves about two meters in front of the net. The coach holds the hitting hand level and places the ball on the left palm above the forehead.
Next, the ball is rolled with forward rotation over the left palm. The ball now travels over the net with a clear upward motion and forward spin. This drill often creates the first “aha” moment for the player.

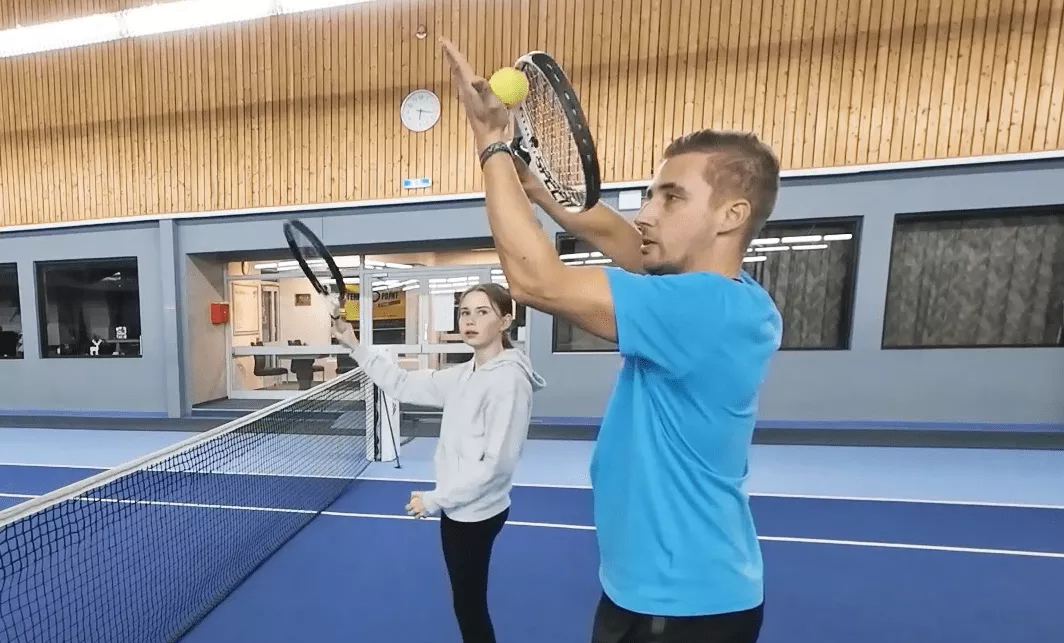
Drill 2: The palm as a ramp with a racket
Now the previous drill is expanded. The sequence stays the same, with the difference that the rotation is no longer produced by the hitting hand, but by the racket. A continental grip or backhand grip is required for this.
In this context, the coach shows the player the correct grip and explains how the racket should sit in the hand. In addition, he provides a simple cue to find the grip quickly, for example holding the racket like a hammer.
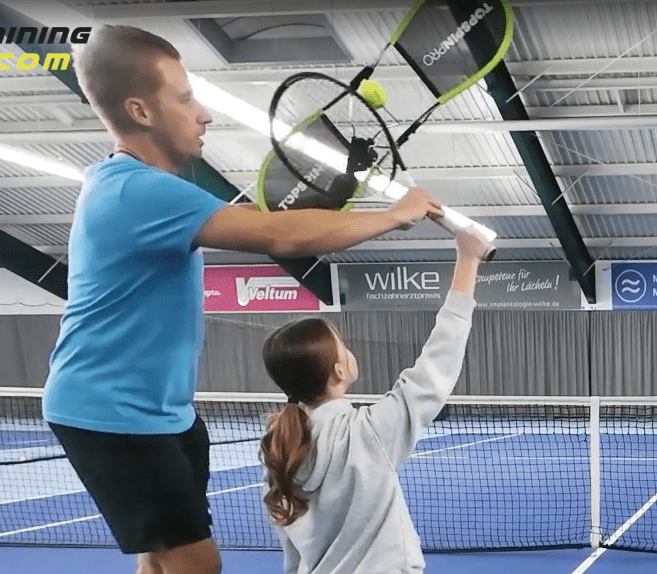
Drill 3: Hitting upward above the head
Now the player holds the racket with a short grip. The goal of this drill is to combine the upward swing learned in drills 1 and 2 with a mini toss. The ball should be played over the net in the highest possible arc.
For this, coach and player position themselves about two meters in front of the net. The ball is tossed slightly upward and then struck with the short grip using a clear upward swing so that it travels over the net.
This drill trains the awareness that the ball must be tossed above the head so it can be struck upward. As soon as the player completes several successful attempts in a row, the progression continues with the next drill.
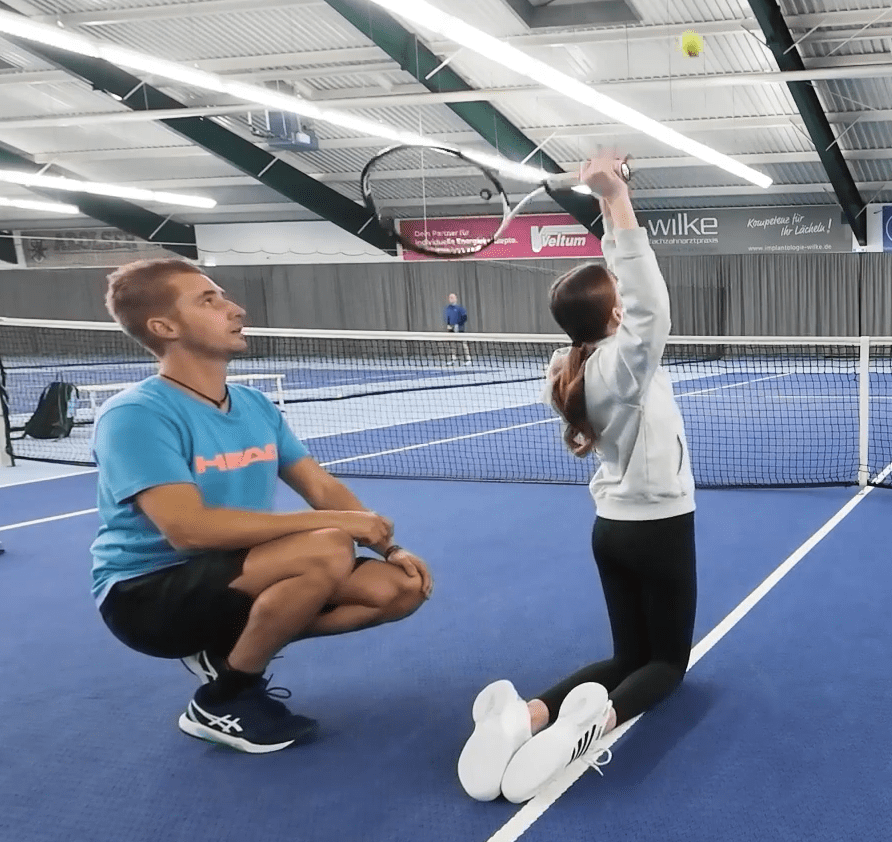
Drill 4: Kneeling with a short grip
This drill is especially well suited for learning the correct toss and teaching the optimal toss position. Coach and player position themselves at the T line. The player kneels in a sideways position to the net.
By kneeling, the player can no longer adjust position. This makes a clean toss mandatory in order to play the ball over the net without losing balance. If the ball is not tossed in a parabolic path in a slight arc to the left, the player will lose balance.
The racket is still held with a short grip, and the swing is performed forward and upward. It is important that the motion stops immediately after contact. The player should deliberately not follow through. Ideally, the racket tip points upward after contact.
If the player has trouble with the toss, the coach can provide support by taking over the toss for a few attempts or by demonstrating the correct toss direction. Very often, an “aha” effect happens quickly in this drill.
Once the player controls the toss and the swing, the player then stands normally at the T line and performs the same motion from a standing position. The serve is still practiced using the short grip.
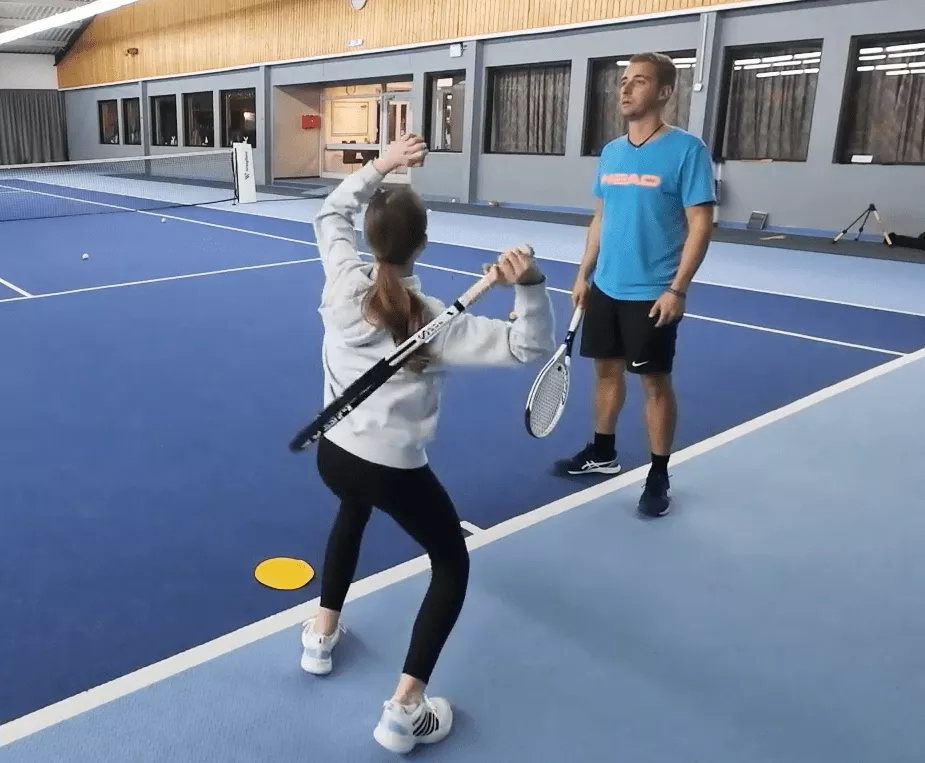
Drill 5: From the trophy position high over the net
In the next step, the racket is held normally again and used with a continental grip. The player continues to serve from the T line without setting target zones or court boundaries. The goal is to hit the ball with topspin as high and as far over the net as possible.
The coach now places the player in the trophy position. The player stands in a sideways stance, and for right-handers the left foot points toward the right net post. The racket is extended upward so the racket tip points toward the ceiling. It is important not to start from a so-called “backpack” position. Michael Kreuzer shows why the backpack exercise is so detrimental to learning how to serve in our technique module for serving.
The ball is then tossed in the same parabolic path learned earlier, slightly to the left, and struck over the net with a powerful upward motion. The follow-through goes to the left side. Here as well, the coach can continue to provide support if needed.
Drill 6: Kick serve with an initial motion
Now the first complete serve from the T line follows. Court boundaries still do not matter. Before the actual serve, the initial motion is added. The player can first do shadow swings to internalize the movement pattern.
As soon as several successful serves are achieved, the coach gradually increases the distance. The player moves step by step closer to the baseline with additional serves. The goal is to serve the kick serve safely over the net and to stabilize the toss more and more. If difficulties occur, the coach adjusts the difficulty level accordingly.
Drill 7: Adding footwork
This drill is optional and should only be added once the previous drills are performed securely, in order to avoid overload. Leg drive is an important component of a dynamic and powerful serve.
First, the movement is practiced without the ball. The player puts the racket aside and, starting from the initial motion, performs the upper-body rotation into the trophy position. At the same time, the player pushes the left hip toward the baseline and actively bends the knees.
Then the leg push is trained. The player drives up out of the loaded position, jumps over the baseline, and lands with the left leg inside the court on a cone. Balance is maintained on the left leg, while the right leg performs an opposite motion backward.
Only when this movement pattern is understood and performed safely is the serve executed with the ball. Court boundaries still do not matter at first.
Conclusion
This progression guides the player specifically and systematically toward a reliable tennis kick serve. In the following training sessions, the movement pattern is reinforced further and refined step by step. Later, the focus shifts more strongly to placement and tactical use in match play.
It is important to practice the kick serve regularly over several weeks. If errors appear in individual key positions, these should be trained in isolation and with full focus before the movement pattern is put back together. Training a few elements intensively leads to the best long-term results.
The post Learn the Tennis Kick Serve: Step by Step to a Reliable Serve first appeared on Tennistraining Online.
O que achou dessa notícia? Deixe um comentário abaixo e/ou compartilhe em suas redes sociais. Assim conseguiremos informar mais pessoas sobre o que acontece no mundo do tênis!
Esta notícia foi originalmente publicada em:
Fonte original